Nothing gunks up an application server faster than having to crunch images, yet image manipulation is a common tasks in today’s applications. Let’s take thumbnail generation as an example. Traditionally, if a user uploads an image, our application would generate the thumbnail during the upload event. The user has to sit and wait for the operation to complete, and we have to hope the server has capacity to handle that user’s operation. Worst case we end in errors, failed uploads, and frustrated users.
To get around this problem, such work should be offloaded into “background tasks”, where expensive operations are handled at a later time than on the traditional initial creation event. For thumbnail generation, the uploaded image may be placed in a queue to be processed later by a separate process. The user can go about their business, and the background processing can be scaled independently of the front end to be better meet demand. Everyone wins. If you’ve ever uploaded a video to YouTube, did you wait 20 minutes with a progress bar while YouTube processed the file? Nope, you came back 20 minutes later when it completed. This is “eventual consistency” at work, and is a far better pattern for distributed, high scale applications.
The AzureCAT PnP team has some great guidance on background tasks here, but I wanted to take the shiny new Azure Functions for a spin. Functions are a way to do serverless computing on Azure, and work well for background tasks. Also, since Functions play nicely with others (C#, F#, Node.js, Python or PHP) I can get going with Node as a first class citizen.
So today let’s use NodeJS to create a thumbnail image anytime a new image is uploaded to an Azure Blob Storage container.
Setup an Azure Function
Provision a Function app via an Azure Resource Manager (ARM) Template or via the Azure Portal:
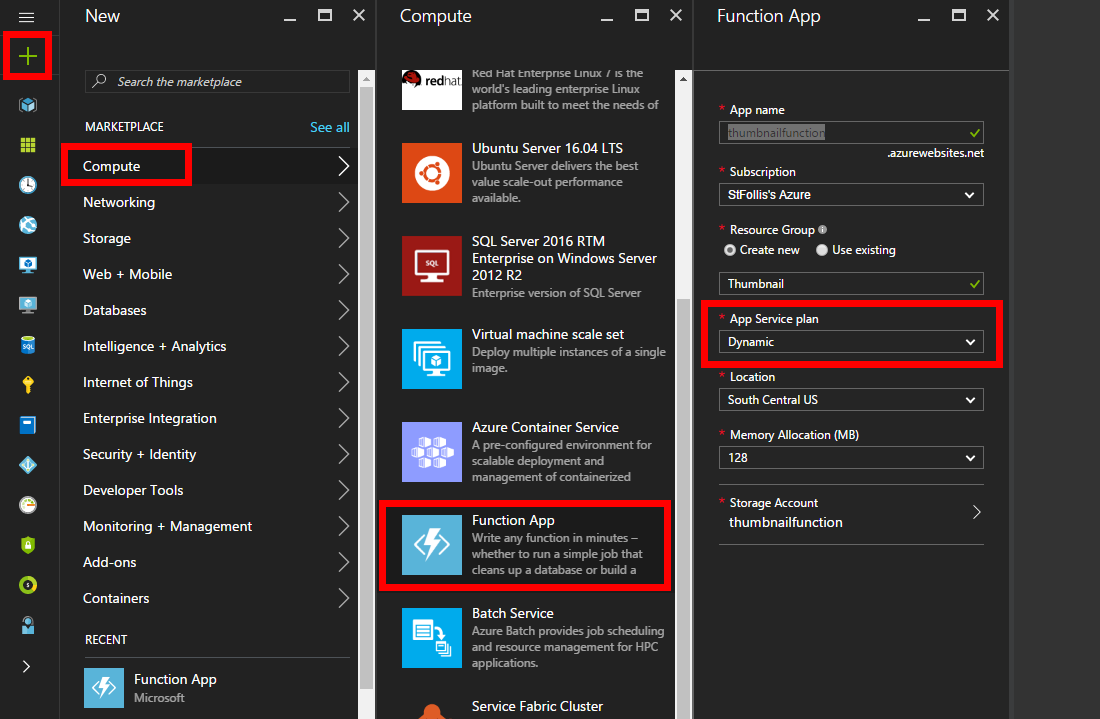
Functions can be used with traditional App Service Plans, but really shine with the new Dynamic Plans.
Note that if you’re using Functions with traditional App Service Plans, enable the
Always Onfeature
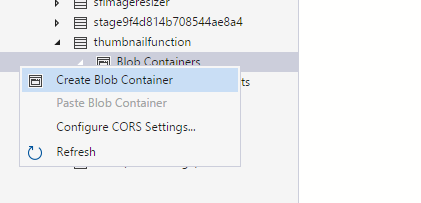
Prep blob storage containers
In your storage account, create two containers: images-original and images-thumbnail. We will drop an image into the original container, and output the manipulated into the thumbnail container.
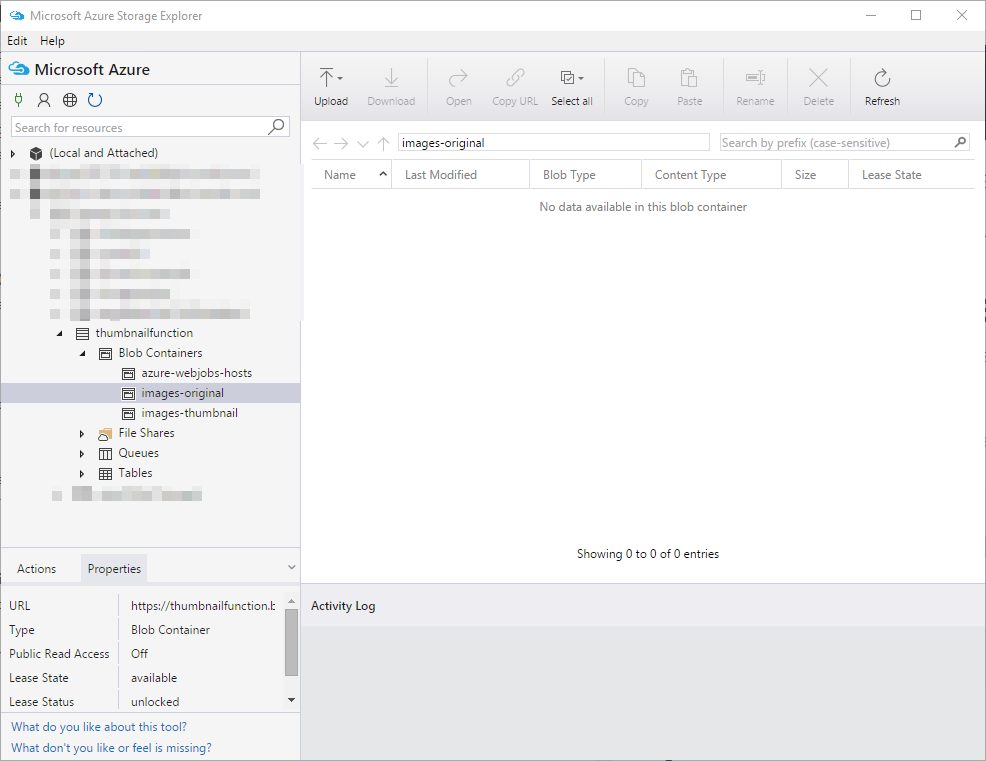
You can create these containers in the Azure Portal, but I prefer to use the cross-platform Azure Storage Explorer.
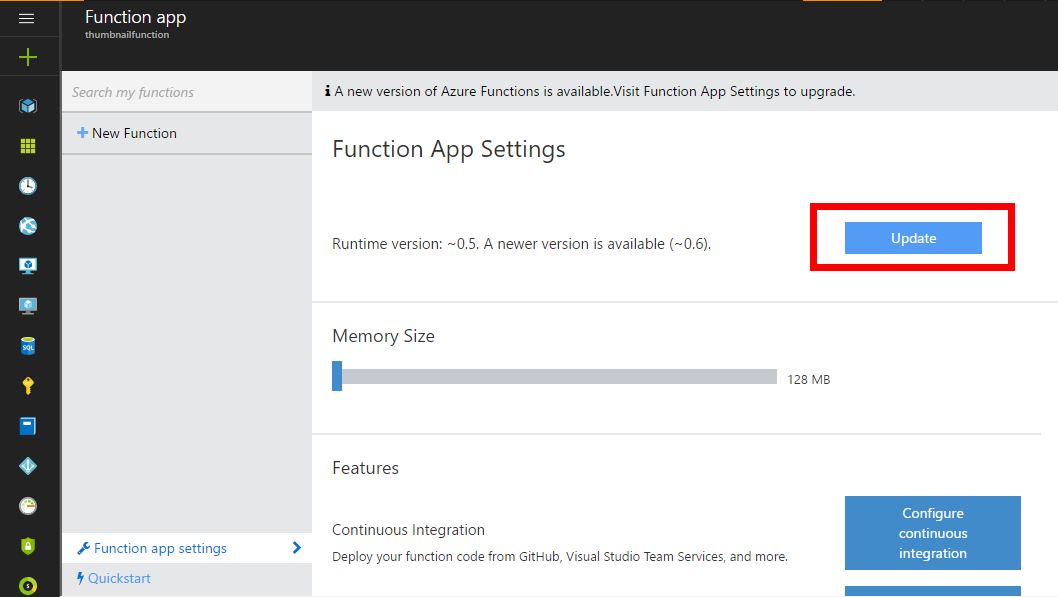
Update Function runtime
Open up the Function in the Azure Portal, and you may see that a new version of the Function runtime is available. If so, select the Function App Settings link in the left navigation.
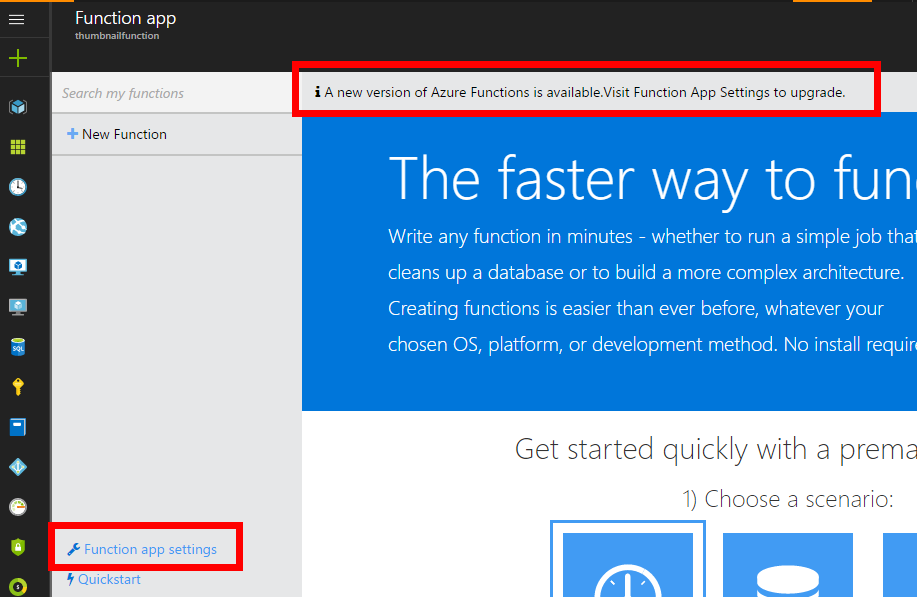
Once there the Function can be updated with the click of a button. It only takes a moment, but will ensure you’re using the most up-to-date and feature-rich version of Azure Functions.
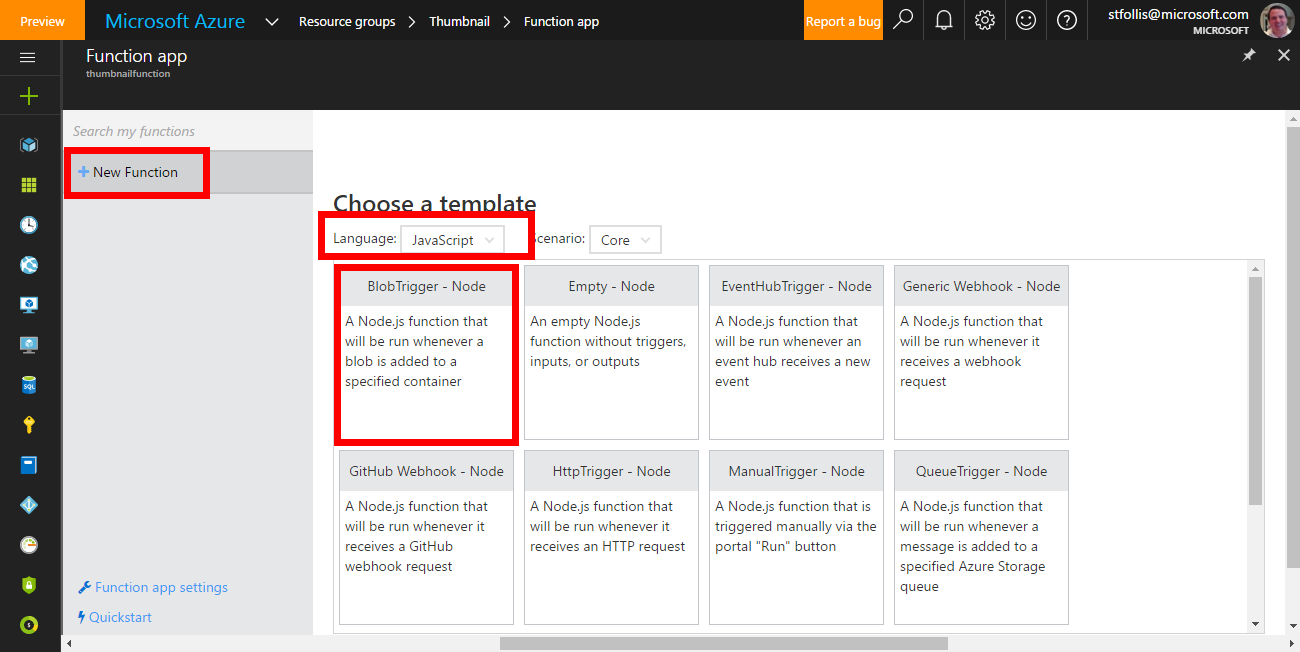
Configure bindings
Now that we have an upgraded Function app, let’s generate a new Function. Click New Function from the left navigation, select JavaScript from the language dropdown, and click on the tile for BlobTrigger - Node.
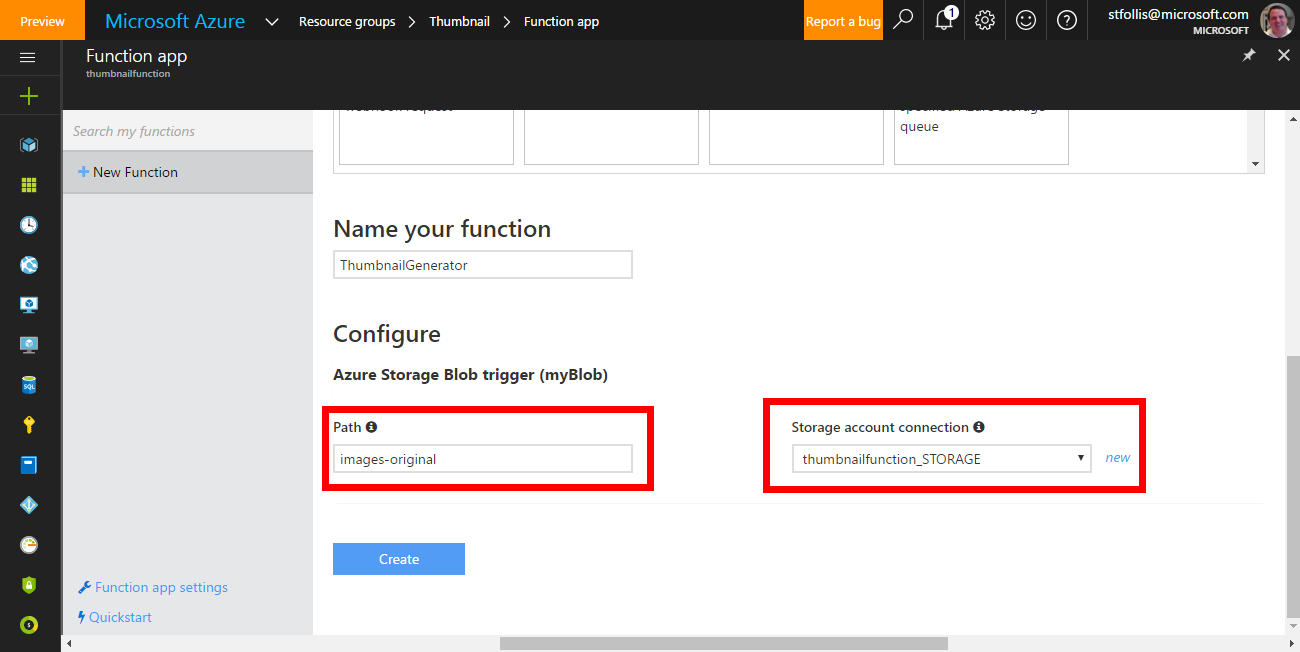
Configure your path to images-original and link its storage account.
We now have a trigger to start our Function, however we also need an ouput for the completed thumbnail image. From the left navigation, select Integrate then in the Outputs column select New Output. In the menu, choose Azure Storage Blob.
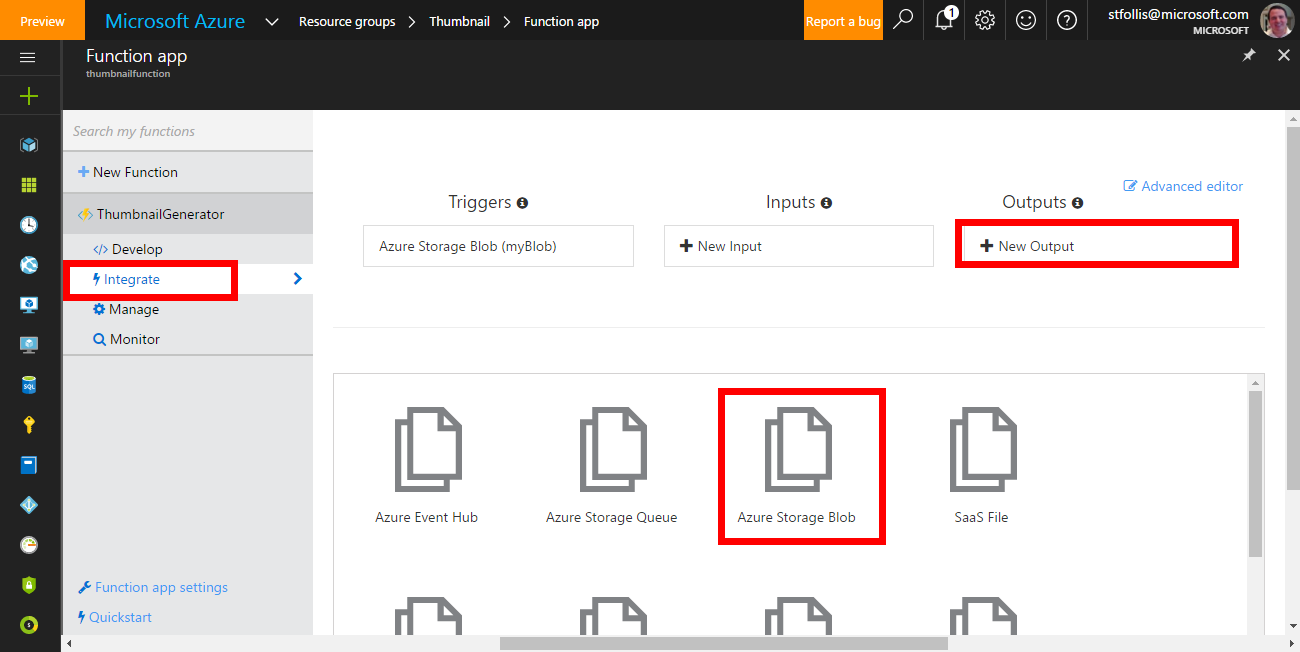
Add your Storage account, and in the path use images-thumbnail. After the / will determine our filename. For this we can use the original image name, appending -thumb as a convention.
Our Function app will not be triggered anytime a new blob is placed in the storage account’s images-original container, and will output a finished thumbnail into the images-thumbnail container without the need for us to write loads of integration code.
In the Integrate window, toggle the Advanced Editor on and adjust the path values in include {name}. This will keep the same filename across both containers. Also add a dataType attribute to the trigger so that binary data is passed into the Function.
{
  "bindings": [
    {
      "name": "myBlob",
      "type": "blobTrigger",
      "direction": "in",
      "path": "images-original/{name}",
      "connection": "thumbnailfunction_STORAGE",
      "dataType": "binary"
    },
    {
      "type": "blob",
      "name": "$return",
      "path": "images-thumbnail/{name}",
      "connection": "thumbnailfunction_STORAGE",
      "direction": "out"
    }
  ],
  "disabled": false
}
Add code
Now let’s add the code for our Function. Click on Develop in the left navigation and replace the Code box with:
var Jimp = require("jimp");

module.exports = (context, myBlob) => {

    // Read image with Jimp
    Jimp.read(myBlob).then((image) => {

        // Manipulate image
        image
            .resize(200, Jimp.AUTO)
            .greyscale()
            .getBuffer(Jimp.MIME_JPEG, (error, stream) => {

                // Check for errors
                if (error) {
                    context.log(`There was an error processing the image.`);
                    context.done(error);
                }
                else {
                    context.log(`Successfully processed the image`);

                    // Bind the stream to the output binding to create a new blob
                    context.done(null, stream);

                }

            });

    });

};
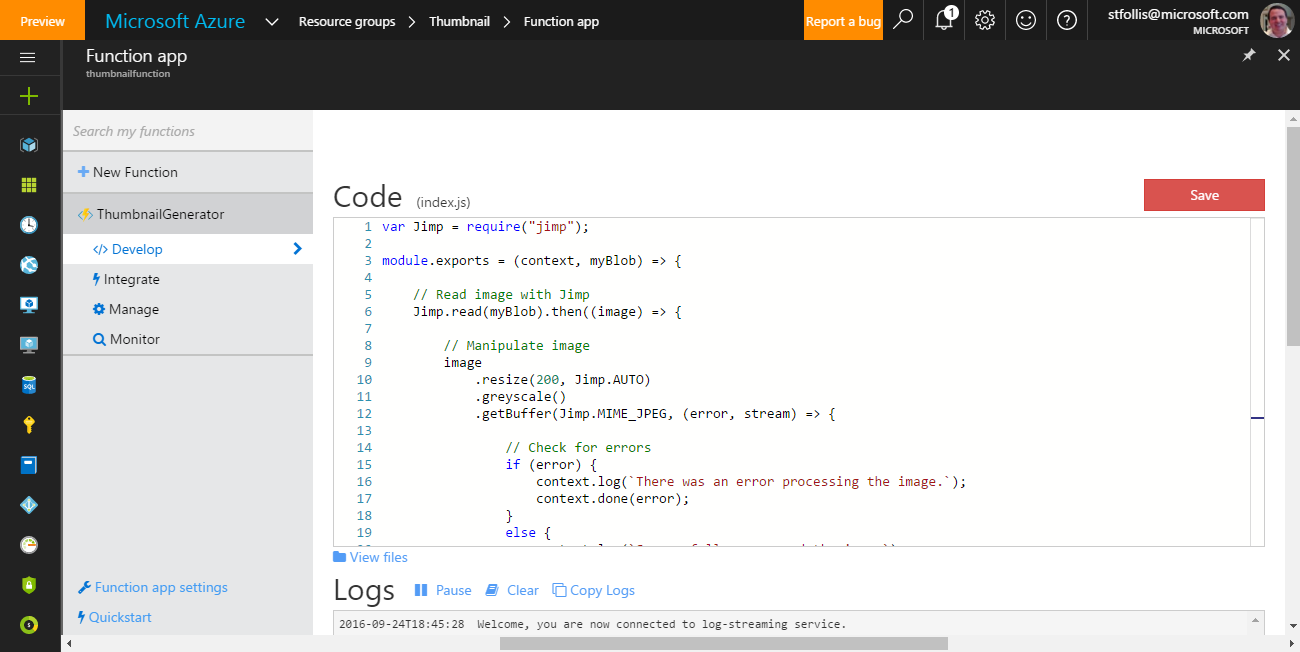
We load the image, manipulate it by resizing its width to 200px (maintaining aspect ratio), adjust its color to greyscale, and then passing the image stream into the Function’s output binding.
This code uses the Jimp library (“JavaScript Image Manipulation Program”) to process the image. There are many Node libraries that handle image manipulation, however Jimp is implemented completely with JavaScript. This limits the dependencies needed, at the cost of some speed.
3rd party libraries can be installed in Kudu. See here for instructions on package management within Azure Functions, and use npm install jimp --save to include the package.
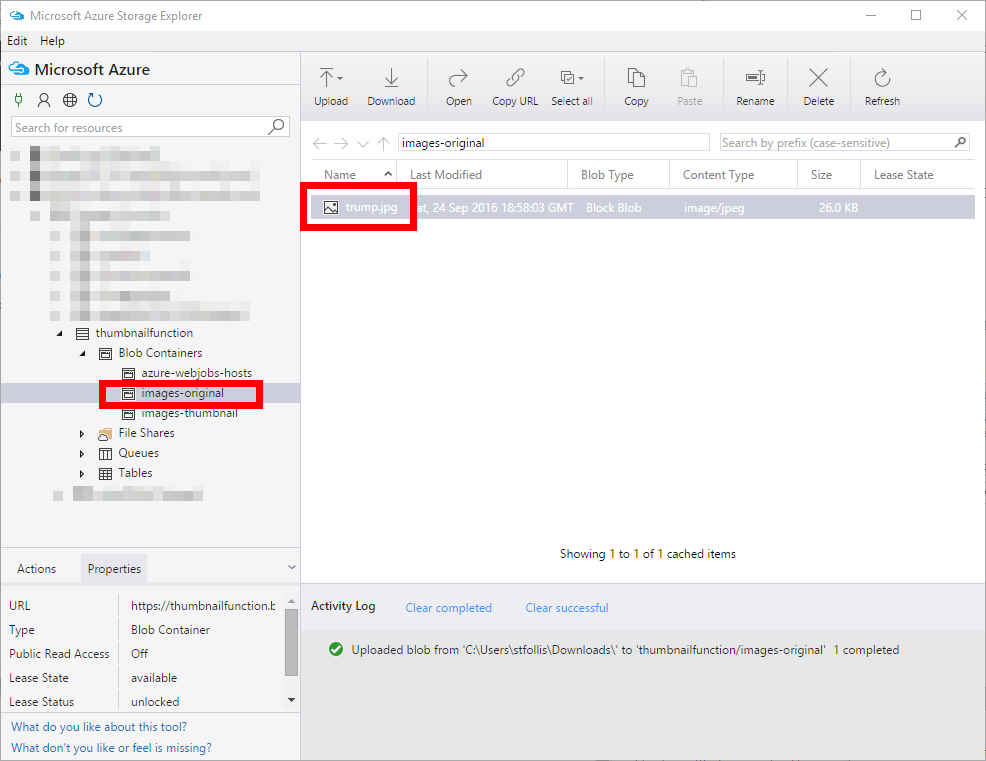
Thumbnail Time
With the Develop tab open to easily see log output from our Function, drop an image into the Azure Storage Explorer’s images-original container.
Here’s a nice 600px by 400px image:

That we’ll drop into the container:
In a few moments we can see logs updating us on the job’s status:
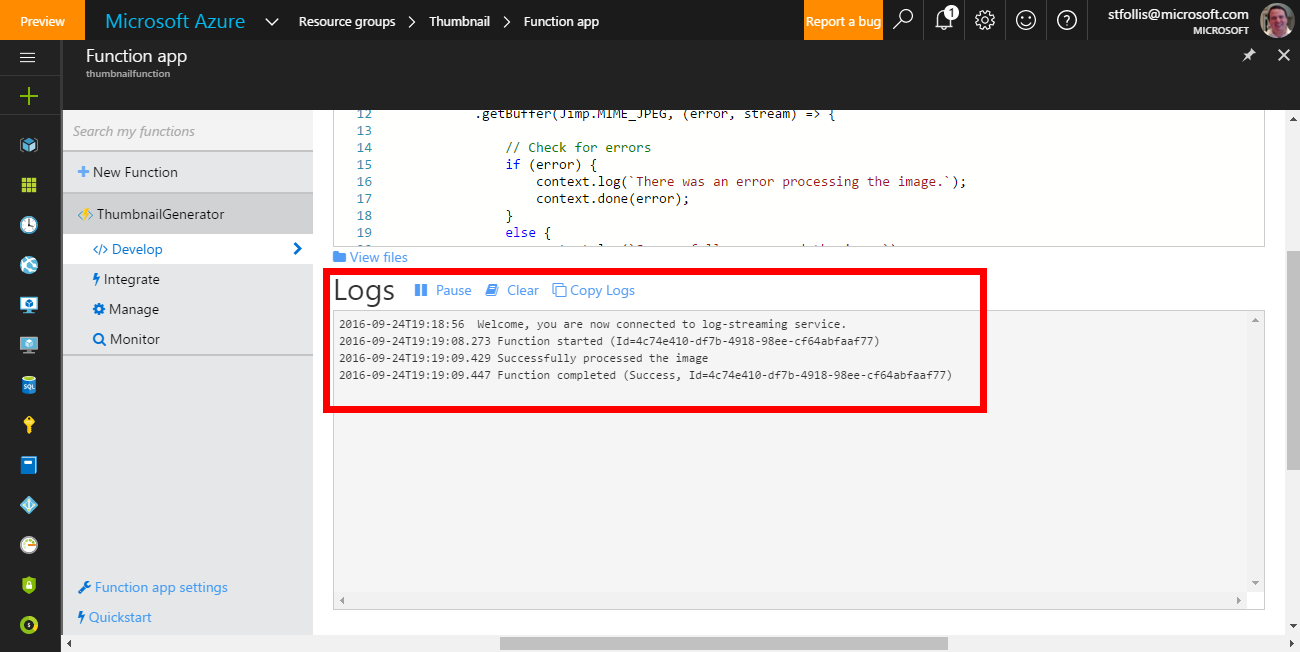
And in checking the images-thumbnail container there will be a new trump.jpg awaiting us:

Note the smaller hands are now a more accurate representation :)
Wrap Up
With this Function, any new blob added will be processed and a corresponding thumbnail generated. This alleviates significant load from our web servers, which now would only have to focus on the initial upload to Azure Blob Storage.
Furthermore, the use of a Dynamic App Service Plan allows us to only pay for each image that is processed rather than provisioned infrastructure that may sit idle for long periods of time. It is a more cost effective method of thumbnail generation than many alternatives.
This example used a blob trigger, however we could have easily used a queue trigger instead to process incoming messages with the same NodeJS code.
Thanks for reading! SF